
 Apache Ant is a
general-purpose build tool, primarily used for the building of Java
applications, but it is flexible enough to be used for various tasks.
Apache Ant is a
general-purpose build tool, primarily used for the building of Java
applications, but it is flexible enough to be used for various tasks.
In the Java world at least, Ant seems to be largely passed over for the immediate convenience and IDE support of Maven, however long term, I believe a good set of Ant scripts offer far more flexibility and room for tweaking your build processes. The downside is that there’s a lot of stuff you need to learn and figure out and build by hand.
In this series of tutorials, I’ll try to document the process of learning I’ve gone through building and maintaining Ant build files, from the most basic of “just compile my stuff” steps to automatic generation of JavaDoc output, dependency management using Ant’s companion, Ivy, unit testing using JUnit, and integrating with some additional tools I’ve been using, such as Checkstyle and FindBugs.
For part 1 of this tutorial, I’ve created a simple Hello World library.
It doesn’t have a main executable itself, the goal of this is to produce
a .jar file we can include in other projects, to start our Ant script
off fairly simply.
The source for this project can be found in GitHub. Here’s the breakdown of everything going on in this project:
At the root of the project, we have the src directory, under which all
our packages live. Normally, an IDE will take care of this sort of
structure for you automatically, since it’s the most commonly accepted
way of structuring a Java project. Also in the root of the project,
you’ll find the build.xml file - this is our Ant build configuration.
Digging into the various parts of the Ant file, starting at the top and working our way down:
<?xml version="1.0" encoding="UTF-8"?>
<project name="hello-world" default="dist" basedir=".">
First is a standard XML version and encoding declaration - Ant won’t complain if this is missing, but it’s a good idea to include in any XML documents anyway.
The next line shows the
project definition.
name is the name of the project, which we’ll also use as the output
file name for our .jar file and any other distributable packages and
artefacts - you’ll see this referred to as the variable
${ant.project.name} elsewhere.
The default attribute indicates the default
target which will
be run when you execute ant with no target specified. Targets are
defined in <target ...> blocks, which we’ll see later.
<!-- basic paths -->
<property name="src.dir" location="src"/>
<property name="dist.dir" location="dist"/>
<property name="build.dir" location="build"/>
Here we’re defining a couple of path
properties which
will be used elsewhere in the script. Often these are defined in an
external .properties file and imported via a
<property file="my.properties"/> line, but for a few simple
properties like these, I prefer defining them in the actual XML, to save
the clutter of an additional file.
In particular, we’re defining the source code path (.java files), as
well as output paths for the compiled .class files and our
redistributable artefacts.
<!-- properties for build output, nothing should need to change beyond this point -->
<property name="build.src.dir" location="${build.dir}/src"/>

<path id="default.classpath">
    <pathelement path="${build.src.dir}"/>
</path>
These are properties building on the more commonly defined ones in the
previous block. This is defining a sub-directory for the .class file
output under the configured build path, as well as defining a class
path, which will be used
for when we actually call javac to compile our code, so it knows where
everything is.
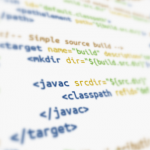
<!-- Simple source build -->
<target name="build" description="compile source">
    <mkdir dir="${build.src.dir}"/>

    <javac srcdir="${src.dir}" destdir="${build.src.dir}" includeantruntime="false">
        <classpath refid="default.classpath"/>
    </javac>
</target>
Now we’re finally getting to a build target. A target is typically one of the names you pass via the command line (or via your IDE, if it has Ant support) to Ant to perform a certain type of build or task.
For example, we’d invoke the above build target from the command line
as follows: ant build
This would ignore the default attribute set in the project
definition, and go straight to the build step.
Let’s break down what’s going on in this target.
Firstly, we need to make sure the output directory using the mkdir
task. The variable
${build.src.dir} being referenced here was defined in a property in
the previous block, and essentially resolves to
project-root/build/src. The mkdir task ensures all parent
directories are created as well if they don’t yet exist.
Next, we’re invoking javac to compile our code using the built-in
javac task. The
srcdir directory references the source path property we defined near
the top of the build script, and the destdir references the build
output directory that was just created with mkdir. includeantruntime
is set to false to exclude Ant including itself in the classpath – I’ve
never encountered a reason to do this; but it defaults to True so we
should explicitly disable it.
Finally, the classpath property within the javac instruction is
making sure our build class path is made available during the build.
In summary, this task will compile all our source into .class files,
and if there are any compilation errors, will report on those via
standard console output and stop the build process. Feel free to
investigate the additional properties and attributes the javac
task makes available –
there are many.
<!-- Build distribution -->
<target name="dist" depends="build" description="generate distribution">
    <mkdir dir="${dist.dir}"/>

    <jar jarfile="${dist.dir}/${ant.project.name}.jar">
        <fileset dir="${build.src.dir}"/>
        <fileset dir="${src.dir}" excludes="**/*.java"/>
    </jar>
</target>
At last, and probably the most commonly used target, dist. This is
generally used for building and packaging your redistributables. Note
that the target names used here, build, dist, clean and others
we’ll be adding over time and not fixed, you may name them anything you
like, these are simply the most commonly used and generally accepted.
Let’s see what this one’s doing.
Firstly, you will notice the addition of the depends attribute to the
target tag. As the name suggests, this target depends on the build
target. When you invoke the dist target directly, Ant will
automatically execute any dependency targets. This way we can chain
complex series of build targets together to orchestrate various bits of
behaviour without needing to re-define everything for every target. A
target may also depend on more than one other target, and these are
defined as a comma-separated list - Ant will execute those dependencies
in the order they are listed.
The first instruction within the target is the familiar mkdir to
prepare the output directory, again referencing a property we defined
earlier.
Next, the built-in jar
task is responsible for
packaging the build output into a .jar file we can use in other
projects.
The jarfile attribute defines the output file. In this example, it
will resolve to project-root/dist/hello-world.jar.
The first fileset property is letting the jar task know where to
find the compiled .class files to be included in the final .jar file
- hence the need for this target to depend on the
buildone first.
The second fileset is for the inclusion of resource files stored
alongside the source files, within the final package. For example, these
would be files you may typically read or access at runtime via a
getClass().getResource(...) call. If your applications are likely to
never make use of such functionality, it’s safe to remove this, but it’s
handy to have available for the time you may.
That’s all. After this target executes, your build directory will
contain a bunch of compiled .class files, and you’ll have a
distributable .jar file in the dist directory.
<!-- Clean compiled files -->
<target name="clean" description="clean up" >
    <delete dir="${build.dir}"/>
    <delete dir="${dist.dir}"/>
</target>
It is generally a good idea to include a clean operation in build
files, which should remove all output generated by a build.
Essentially this should return the project to it’s freshly checked out
state, with no extraneous files and directories.
Here, we’re only making use of the delete task, which will remove the contents of the paths specified, as well we the paths themselves. When you extend your builds to perform more interesting things, and you end up creating more directories or files, make sure to clean them up.
That’s all there is to a simple build script, which at this point, is perfectly usable for creating simple stand-alone libraries, which don’t depend on any external libraries, and which don’t need to be run as stand-alone applications.
In the next part, we’ll see how our application can be made runnable.
Other parts in this series: